Wednesday, December 31, 2008

Threesies


Thanks to the magic of printable iron-on transfers, I made these onesies as a Christmas present to my upcoming niece. Now that I've made these, I want to make a million more! I just used copyright free clipart images (yay for no copyright issues!), printed, cut out and ironed on. The bear turned our perfectly - but peeling off the backing to the other two animals didn't go as planned, so I had to leave a little background on them. I think next time I'll add color to the backgrounds to make this an asset, instead of a glitch!

Oh, those little onesies are so tiny, people! It's pretty exciting to think they'll have a brand new little one in them very soon. I can't wait to meet the new little peanut!

Seven Random Things

I was tagged by Cheryl this week for a 7 Random Things post, so here goes! (Doesn't that picture make you long so very much for summer? It is soooooo cold and crazy windy here today, so a little flower love seemed the ticket)

1. I love old movies. I'd almost rather be watching TCM than anything else. I love seeing a glimpse of past culture, seeing what people found funny, sad, entertaining or riske a long time ago somehow makes that time in history more real. I also just love the sound of an old movie - modern movies just don't sound that way anymore.

2. I have a fear of toilets overflowing - seriously. When I'm stressed out, sometimes I'll have nightmares involving a toilet that won't stop overflowing. I'm not sure why exactly, but the arm chair psychologist in me thinks maybe control issues are at hand...Either that or the scary, old fashion power flush toilets in my grade school scarred me for life!

3. I was obsessed with horses as a kid. I would plead with God to just let me have a horse and a lot of my play time involved pretending to ride. I was actually lucky enough to take lessons in high school, and I'm pretty proud of having that particular skill. I haven't ridden since college, which makes me really sad, but hopefully some day I'll have a little extra money around for some horse time.

4. I the youngest of three sisters, and we all shared one room growing up. It was the half-story upstairs of our house, but still, the teen years were pretty rough!

5. I think Katherine Hepburn was just about the coolest lady ever. She's my favorite actress, and I love her strong will, no-nonsense next to the moments of softness she played. I can usually identify big time with her characters.

6. I love to plant gardens, but sometime around August, it just gets to be too much. The heat gets the better of me and I get super lazy, and the weeds take over. I'd love to have a beautifully maintained garden one day - hopefully I'll get a little closer with T's help this year :)

7. I love sitting in rocking chairs - we grew up with la-z-boys my whole life, so sitting still in a chair can be a real challenge for me! I think this might actually be behind the knee pain I'm starting to experience, come to think of it!


Since Cheryl and I share a lot of bloggy friends, and I don't want to double tag them, I've just got one tag-you're it. Anyone else that wants to play along, please do!

Katherine at A Book, a Nap, a Dog

Saturday, December 27, 2008

A Thing of Beauty

Yes, there she is, on her maiden voyage - my spankin' new KitchenAid mixer. Oh happy day, I can now mix bread dough without paining my poor little hands. This wonderful vision was made possible by a lovely Christmas present from my parents and my sister K. Thanks guys!

So I made up some bread at the first chance, and it was so dang easy with this thing. My hands barely got floury people. The only tricky thing is knowing when you've got the right consistency or worked the dough too much or too little, since your hands aren't actually in it. Oh well, I'm willing to have a little adjustment period! This loaf came out beautifully, and was practically half-gone shortly thereafter. Yum!

Friday, December 26, 2008

Happy Day After Christmas!


I hope everyone had a wonderful Christmas! Since I had an extra day off today, I thought I'd finally take the time to hop onto the meme train, and answer this holiday related one from Cheryl.

01. Wrapping paper or gift bags?
Definitely wrapping paper - so many pretty designs, and I'm a sucker for paper folding, and making the stacks of boxes all neat and pretty and shiny.

02. Real tree or artificial?
Well, I grew up with artificial, and I have an artificial one I got for cheapo in college. The thing about them is you only have to buy the tree once. I do very much want to have a real tree, but can't seem to make myself part with the money this year. The real thing does look and smell so wonderful.

03. When do you put up a tree?
Just after Thanksgiving. I like having it up and enjoying it for a while. Why not have the extra pretty up for a good long time? :)

04. When do you take the tree down?
Usually just after New Year's. I'm usually ready for it, but it's sort of a depressing day. All the fun and prettiness are over, and the real long haul of winter has just begun. :(

05. Do you like eggnog?
My goodness, yes! Oddly enough, though, since I very deeply hate eggs. But usually if you add enough cream and sugar to them, I can be persuaded to love them. Not to mention bourbon.

06. Favorite gift as a child?
The first year Cabbage Patch Kids were super big, my parents worked together to make all three of us homemade versions. Three dolls would have been a lot of money. Mom did sewing and Dad painted the eyes on. When I think of the time and effort involved, and remember sitting outside their bedroom door as mom was tyring to hide and work on them, I feel really lucky.

07. Hardest person to buy for?
Probably my Dad.

08. Easiest person to buy for?
My niece! Good books are a very easy sell with her.

09. Do you have a nativity scene?
We did growing up. I don't think I'd have anywhere to put it, now....

10. Worst Christmas gift you ever received?
I really don't know...Can't think of anything that bad.

11. Favorite Christmas Movie?
I have three! Charlie Brown Christmas Special, The Muppet Christmas Carol, and It's a Wonderful Life. Does Meet Me In St. Louis count?

12. Favorite Christmas Song?
That's a hard one to answer! I think my favorite carol is The Carol of the Birds, and my favorite secular song this year is Have Yourself a Merry Little Christmas.

13. Travel at Christmas or stay home?
Oh, stay at home fer sures.

14. Have you ever recycled a Christmas present?
I can't remember if I have or not. I'm going to go with no, but that doesn't mean I never will, in an appropriate way, of course. :)

15. Favorite ornament or theme color?
I love silver and gold sparkly things! I also like a mix of handmade, "natural" looking stuff mixed in with the fancy things. Oh, and I super love my Victorian tree tinsel - it's thin, shiny twisted metal strips, so you can reuse it.


Well, what're your answers?

photo credit from flickr

Tuesday, December 23, 2008

Last Minute Gifties

Well, it's almost Christmas Eve, and I'm totally done with presents! I bought a few and made a few, like the one below.


I haven't done any embroidery in years, so this was a really fun and gratifying project. I simply cut out two layers of my shapes, and did any stitching that went through one layer only, like the hearts or the bird's eyes and wings. Then I layered them, placed the ribbon for the hanger, and used my machine to sew it into place. At that point, I trimmed up the edges to make them flush, and I was ready to stitch them together. For the star I went with the can't-go-wrong running stitch, and I trotted out blanket stitch for the bird. Blanket stitch was a little trickier, had to look it up first to remind myself, first. I really love the look of the stitching on the felt, so I'm pretty sure I'll be making more of these for my own tree!

Sunday, December 21, 2008

I Love the Java Jive

Several years ago, my dad found plans and hardware for a coffee mill in a wood working catalog and thought that might be a neat project. So, he made a few, and being the lover of old timey things that I am, I think it's pretty neat to have a coffee mill around the kitchen. Even though I don't use it every day, I like looking at it and knowing it's there.


(Yes, it is sitting on a pillow. That's the only way I can get it into some natural light these days. Stupid winter. )


Well, I accidentally bought whole bean coffee the other day, and had a chance to get reacquainted with it. I think the hardware's rather nice, don't you? So, to grind coffee, you put your beans in the little hopper at the top, and turn the wheel. Peek in every once in a while and make sure the beans are feeding down in, listen to the comforting grindy-crunchy sound, and that's it. When you're all done, just open the little drawer, and there ya go - fresh coffee, ground by your own little hand.


Boy, does that fresh ground coffee smell good. And it was an even better cup of coffee. While it's certainly not as speedy, there's something much more satisfying about doing it this way than the noisy little electric grinder.

Wednesday, December 17, 2008

One For Me, One For You

I recently made these grown-up/kid aprons for a friend, so that she'll be giving a surprise present at Christmas this year. I found the amazingly easy to sew instructions from this awesome instructables. I customized it a bit by making it reversible, lifting the how-to from Lotta Jansdotter's Simple Sewing. The adjustable strap/ties make this a really comfortable fit in my humble opinion. No one likes to be choked by their apron. No one. And the ties are super long, so you can wrap around back to front, and still have lots of length to tuck a towel or tie a kicky bow. What's not to love?


Monday, December 15, 2008

Lighting It Up...well, just a little

It's only a matter of time before I start to make soap, people.

I made my first candles ever last week. Well, now that I think about it, there was that time camping (as a kid) that the park service people had activities going. Each kid got a wick, and there were two buckets of melted wax many feet from each other. We all formed a line, dunked our wick, walked to the other bucket, dunked it again, etc., etc. Slowly, ever so slowly, a candle took form. While this sound sort of dull, it was actually a lot of fun. I think they also showed a nature film that night. The seats around the screen were big logs, if I remember correctly. Aaahh, good times.

But I clearly digress. I was taken with my new candle idea when I heard about a local candle store that makes soy wax candles with a million different essential oil scents to chose from. I also noticed that Joann's sells soy wax. So, in an amazing whirl of syncronicity, I got the wax, unburied some cool little jars from under the kitchen sink, and went to work.

The whole process was pretty simple. With a cheap pan from the V.O.A. I made a double boiler to melt the wax on the stove top. After it gets to a certain temperature, you take it off the heat and add your scent. I chose bergamot, because it's the best smell in the whole world. Well, I added and added and added, but it was really hard to tell if I added enough. In the end, the candles aren't very strong, but hopefully I'll have better results with the next set.

I have to say, the trickiest part was getting the wick to stay put while they set up. I eventually had to tie strings to them, then tie the string to the kitchen cabinet knobs. Sheesh. Well, even if they don't smell too strongly, I think they look lovely - which, in this world, as we know, really seems to make up for a lot.

Friday, December 12, 2008

Stick it to yo' fridge!

I found this idea on One Pretty Thing, but can't remember which post now, though. That site usually makes my head spin with things I want to make!

This is another so easy, so fun project that leaves you feeling giddy because the results are pretty darn cute. You simply take adhesive backed, business card size magnets - which I found in the most random aisle at Joanns - and you cut them into 2'' squares. This leaves you with a little left over piece that's odd sized, but still very useful.

You then pick our a cool fabric scrap, or fun picture from an old book, or just anything that will stick to the magnet, and lay it on there! Trim off the excess, and blammo, you have a unique, adorable magnet! The project creator advised using a little fray check on the edges of the fabric, to keep the little threads from going crazy. I also coated mine with Mod Podge, for a little extra protection. I kept thinking how epoxy would've been way shinier and cooler, but oh well. Maybe next time.


The owl and pears are from the fabulous Lolly Chops, who makes the most truly adorable things in the world. The dots are a fabric I've had around for-eva. The little boy is from a super old children's dictionary I picked up at work, and the last is from an old French story book, also snagged from the donation pile. I love how "boom" turns into "boum" in Frenchy land.

Check out this bug!

So I wandered into the bathroom the other day, and my eye was caught by motion - which is unusual when you're in the bathroom alone. Well, there trekking across the toilet tank was this:


Now - it's winter. All of the other creepy crawlies that I expect to find wandering the house are gone. It was kind of warm this day, but come on! This guy was at least 1'' long, so I don't think he's a newborn.

Well, after the startle in me settled out, I obviously was intrigued enough to grab the camera. He really was a cool bug, and had the funniest hesitant gate. He actually reminded me of a picture book I read all the time, about gnomes and bugs and fairies. He looks exactly like one of the characters! Anyway, I thought he was kinda cool, and maybe just a little out of place.

Thursday, December 11, 2008

Christmas Pretties

Those ancient folks sure had the right idea to start up the festival atmosphere and solstice fun-times when the world is starting to look its crappiest. All the pretty stuff in the natural world goes away, but now Christmas lets us make things look a little better, right? I'll admit - I had my outside lights up on Thanksgiving Day, but only because it was so warm out! I swear!

Here's a few of my favorite decorations this year.

This ingenious, simple and elegant decoration is so easy, I wanted to make a million. In fact, I did at work, to decorate our meeting room. But at home, I had to rein it in a little. I friend posted these directions from Design Sponge as a simple, inexpensive homemade decoration. And they are exactly that. With a little thread and ribbon, they are now strung over my living room windows. I used some scrap booking paper for these, but the simple red and white ones at work look lovely and simple, too.
And here are my absolute favorite decorations on the tree. I think I got these at a Joann's, years ago. Now I wish I'd gotten more, to cover the whole tree. Ooooh, sparklies.


I got this tree topper at Ikea, years ago, too. I love how it's fancy but very rustic at the same time. I do wish that some day, though, I'll be able to convince myself to part with the money needed for a for real tree. Oh well, it's still pretty and sparkly, and silver and gold, just like Burl Ives the snowman says.
Now, I need to figure out if I can take a picture of the outside lights while they're on at night, cause that is my very favorite part of the season - big, fat, colorful lights up, brightening up the night.

Tuesday, December 2, 2008

Pretty Pears

I set my pears up in the sunshine to soften up for the Thanksgiving custard tart, and they looked so pretty up there, I couldn't help taking a few pictures.

You can almost watch the sun come out from behind the clouds, then go back again in these pics.

I'm having a little love affair with jars, now, too. I just love the light going through their different shapes and colors, old jars and new.

Friday, November 28, 2008

Dotted Bag

One nice thing about times being a little lean, is that you're given the chance to make gifts for friends and family, and really focus on making them well. I made this handy tote for my sister's birthday a few days ago. I was actually able to make it without having to purchase a thing, and I was really happy with how well it turned out.

I used some old painting canvas I'd had around for years as a liner, to make it really sturdy. The outside is a linen-like fabric, and I used a heat and bond film to applique the three dots. Easy peasy. Like always, the hardest part was wrapping my brain around sewing the lining to the outside and turning it inside out... Which I actually gave up on and just turned the seam allowances in to face each other and just sewed it all from the outside. Phew, much easier on the noodle, and looks just as good.

Bottling Day!

Time to bottle finally arrived this past Wednesday, so I spent a few hours sanitizing our bottles and whatnot and getting everything all ready to go.


Here they are, ready to receive. One 5 gallon batch makes about 2 cases, or 50 beers. We finally have enough bottles from previous batches that we don't have to soak and remove labels anymore - which saves a lot of time, let me tell you. After you wash bottles out, you leave them in a sanitizing solution (I have my suspicions it's just oxyclean, but I'm not sure) for about 3 minutes. You don't have to rinse - just let them dry out some. Now you're ready to go!

In order to carbonate, you have to add one last blast of sugar for the yeast to eat up - yes, those bubbles are just yeast gas (tee hee!). There are a lot different ways to do this, and this batch we're trying out using dried malt extract (DME). We dissolved the DME in about equal parts water, and boil it for around 10 minutes, to make sure there's no bacteria hanging out in it. Then we gently added it into the beer. Now we're really ready to bottle.

We siphoned the beer out of the carboy, previous to this, and into the bottling bucket, which has a spigot. At this point, you just turn on your spigot and fill up the bottles - carefully. There are little things you can attach to you spigot that make it easier - they fill when touching the bottom of the bottle, then stop as soon as you remove the pressure. Ours broke a couple of batches ago, and it wasted a lot of beer, so we're sticking to our spigot.

After you fill, you cap. We have a handy dandy bottle capper to make this happen.
After placing a new cap on, you just place the capper over it, and press down with both handles. It takes a little oomph, but not too much. I think this is the fun part of bottling.

Well after 50, give or take, there you are - 2 cases of beer, made by your own little self. Sadly, we have to let these guys bottle age. If we drank them now, they wouldn't be fizzy and they might not taste as great as they will in 4-5 weeks. With cane sugar, you can usually drink after about 3 weeks, but DME takes a little longer. So, here they are, back in the coat closet, silently becoming delicious. Eat up, eat up, little yeasties.

Since there's usually a few sips that won't go into a bottle, we tested this out, and guys - it was good. It's always a pleasant surprise when it turns out the way you'd hoped. It tastes like wonderful, fresh, creamy Guinness - better than any I've had bottled or draft, in the U.S. or U.K. So, now we have another reason to be excited about Christmas Eve - we can celebrate by cracking open our own yummy Guinness!

Wednesday, November 19, 2008

Little Bird, Little Bird

After falling in love with the little stuffed bird ornaments in Last-Minute Patchwork + Quilted Gifts, I decided to make my own, winged version this year. And just like last year, I made these a gift to a great friend, so I couldn't write about them until she received them! I used coordinating fabrics for bodies and wings, so there are little birdie pairs.


I also made some simple stocking ornaments to go along with the birds, in matching fabrics.


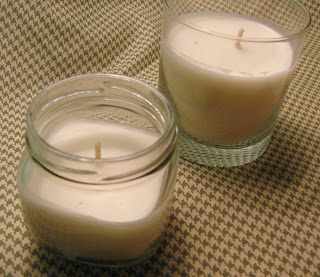
They were very easy to make and I think they turned out sort of darling. And who doesn't love something with pretty ribbons attached?

I just found another great bird pattern today from Design Sponge via One Pretty Thing, so it looks like there may be some more birdies in my future!

Tuesday, November 18, 2008

Cheese, Glorious Cheese!

The time has come to talk of cheese, my friends. Cheese that you can make in your very own kitchen, as my friend K and I did this past Sunday. I know - it's pretty exciting, but scootch back off the edge of your seat - all will be revealed.


K had been longing to make cheese, and I was right there for her, wanting to make cheese, too. K purchased this amazing kit from Ricki the Cheese Queen, yes, you heard right, the Cheese Queen. It has everything you need to make 30 batches of mozzarella or ricotta.


Okay, so let's begin! We start, of course, with milk. Low-temperature pasteurized milk, whole or skimmed. We went with whole, cause, come on - fat makes everything more delicious. Apparently ultra-pasteurized milk won't work, because the heat denatures the proteins, and I can't imagine what you end up with, but I don't think it would be pretty. So, we begin with a gallon of milk, like this:
Prior to this, we added 1/4 tablet of rennet into 1/1 cup of water to let it dissolve. We also took 1 1/4 tsp. of citric acid and dissolved it into 1 cup of water. This citric acid solution was then added into the milk, and heated on the stove to 90 degrees. After reaching your temperature, you take the milk off the heat, and add the dissolved rennet, stirring up and down (for some mysterious reason). At that point, you leave the stuff alone for 5 minutes, to work its magic. After that time you get this:


This is curds and whey, people! Let's shudder briefly for Little Miss Muffet, who hopefully was eating cottage cheese. The milk solids, well, solidify into a sort of custardy texture, separating from the whey. Now it's time to cut the cheese! Well, okay, cut the curds...


This is K deftly cutting the curds in a sort of grid to gently break them up, so that they will be ready for the next step, reheating up to 105 degrees, being "slowly moved around," as the instructions told us to do.


After hitting the temperature and with additional stirring time, our curds began to sort come together more in the whey, and ended up looking like this...


Kind of groty, right? I'm not gonna lie to you, at this point, there is an unfortunate (but faint)baby spit-up odor in the mix, but the path to cheese is not without its perils...Well, okay, it really sort of is - it's miraculously easy. Next we drained off the whey - K making a lot of great whey puns all the while. We were shocked at the amount we were left with, momentarily convinced that we had created matter. Here's the curds separated from their pal, the whey.


Now comes a series of trips to the microwave for short periods of time, to heat and then separate more whey. Then comes the stretching, when K bravely handled the piping hot curds, stretching and unifying everything into something that looked like, and - hey - actually was cheese! Before the very end you add in a little salt or herbs or hell, whatever you want.


There it is! Mozzarella cheese! This first batch took maybe 45 minutes to an hour, and the second batch really took just a half-hour, as the directions said it would. Here's the glamour shot of the cheese, right before we sat down and put it to good use with the help of some crackers.

Isn't it pretty? It was damn tasty, too. In addition to cheese, we also used some of the whey for a pizza dough, and made what is darn close to a salted caramel ice cream. All in all, it was a very fulfilling day in the kitchen. As Ricki the Cheese queen says, it's just the beginning of our cheese adventure!